                     *  .  *
                   . _\/ \/_ .
                    \  \ /  /             .      .
      ..    ..    -==>: X :<==-           _\/  \/_
      '\    /'      / _/ \_ \              _\/\/_
        \\//       '  /\ /\  '         _\_\_\/\/_/_/_
   _.__\\\///__._    *  '  *            / /_/\/\_\ \
    '  ///\\\  '                           _/\/\_
        //\\                               /\  /\
      ./    \.             ._    _.       '      '
      ''    ''             (_)  (_)                  <> \  / <>
                            .\::/.                   \_\/  \/_/
           .:.          _.=._\\//_.=._                  \\//
      ..   \o/   ..      '=' //\\ '='             _<>_\_\<>/_/_<>_
     : o|   |   |o :         '/::\'                 <> / /<>\ \ <>
       ~ '. ' .' ~         (_)  (_)      _    _       _ //\\ _
           >O<             '      '     /_/  \_\     / /\  /\ \
       _ .' . '. _                        \\//       <> /  \ <>
     : o|   |   |o :                   /\_\\><//_/\
      ''   /o\   ''     '.|  |.'      \/ //><\\ \/
           ':'        . ~~\  /~~ .       _//\\_
jgs                   _\_._\/_._/_      \_\  /_/
                       / ' /\ ' \                   \o/
       o              ' __/  \__ '              _o/.:|:.\o_
  o    :    o         ' .'|  |'.                  .\:|:/.
    '.\'/.'                 .                 -=>>::>o<::<<=-
    :->@<-:                 :                   _ '/:|:\' _
    .'/.\'.           '.___/*\___.'              o\':|:'/o
  o    :    o           \* \ / */                   /o\
       o                 >--X--<
                        /*_/ \_*\
                      .'   \*/   '.
                            :
                            '
Okay, last tutorial for the home dec project. This one’s super easy…
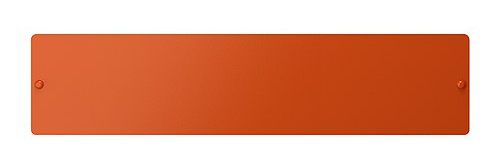
I wanted a magnet board to hang by my desk. I thought I could pick up a cheap one at Ikea. Well I could…but the size I wanted was BRIGHT ORANGE! Meet the SPONTAN:
So I covered it in fabric.
Steps:
1. Lay magnet board on fabric. Cut fabric an inch or so larger than magnet board all the way around.

2. Use duct tape to affix fabric to board. (I happened to have navy blue from a previous project.) This is the lazy man’s way out, but it works and doesn’t show…

3. That’s it.

I also covered a pencil cup with this same fabric (I don’t have a photo), but I used fabric glue on that one, not duct tape.
Caveat: I’ve found that with the fabric on the board, it is not super magnetic any more. I can stick up papers and other light-weight things (even a calculator), but heavier objects just slide off. Even my pencil cup needed a “helper magnet” underneath.
If I were to do this again, I think I’d use coordinating gift wrap instead. Though it would be less durable, I don’t think it would interfere with the magnetism as much.
Okay, so there don’t seem to be any cute hanging file solutions that fit the Ikea Expedit. Sure you could get a drawer insert or insert with door, but a) you’d still need some type of hardware for the hanging files, b) they’re EXPENSIVE! and c) they don’t come to match the birch finish.
What I wanted was something that matched my decor, was cheap, and was easy. Enter the “DIY File Drawer”.

I’m a big fan of banker’s boxes. They’re a handy size and cheap. Bonus that they fit files. For my project I choose the [IN]PLACE brand banker’s boxes from OfficeMax because they had easy glide file rails (for letter size hanging files) built in and I could get a pack of less than a dozen (they come 6 to a pack).
** UPDATE: Office Max no longer seems to carry the [IN]Place brand bankers boxes. That’s really too bad since they were a great product. I’ve looked for an alternative. The closest I could find was Bankers Box® Hang’N’Stor™ boxes, though they don’t have the plastic rails and are more expensive. You can buy them from Staples, Office Max, or Amazon. **
For each drawer front I used a 13″ x 13″ square of mat board (you could use scrap cardboard).
** UPDATE: It’s one year since I made these…scrap cardboard would have been too flimsy. The mat board is still intact but is starting to bend a bit. **
I cut out a piece of fabric about 1–2″ bigger all the way around (so 15 or 16 inches square). I lay the fabric right-side down on my work surface, and centered the mat board on top of it. Starting with two adjacent corners, I glued the fabric around to the back of the mat board (I used fabric glue). I then glued the corresponding edge fabric too:

Glue the fabric of two adjacent corners and the corresponding edge to the back of the board.
At this point, I placed the drawer front on top of the short end of the banker’s box, centering it horizontally, and lining it up so it was flush along the bottom of the drawer front and the box front.

Center the drawer front horizontally and vertically line it up flush with the bottom of the banker’s box
I then draped the still unglued portion of fabric back over the glued portion so I would have access to the mat board beneath.

Pull loose fabric back to access board
Use an awl or the sharp point of a scissors to bore small holes through the mat board and box front. I spaced these about 1–2 inches in from the inside corners of the banker’s box. Using regular office paper fasteners, I attached the drawer front to the front of the banker’s box. I used small washers on the inside of the box to reduce stress from the paper fasteners on the cardboard.

Affix drawer front to banker’s box with paper fasteners

Place small washers over the paper fasteners before extending the prongs to reduce stress on the cardboard
Glue the fabric at the top corners of the drawer front to the back of the mat board.

Glue the fabric at the top corners of the drawer front to the back of the board
Next, apply glue to the back of the mat board at the sides of the banker’s box.

Apply glue to remaining sides
Then wrap the fabric around the edge and attach. You will likely need to loosen the paper fasteners for this step and it helped me to use a thin pointy object to force the fabric between the back of the mat board and the front of the banker’s box.

Wrap fabric around edge to meet glue; tuck in excess fabric
Now, glue fabric at top of drawer front to back of mat board.

Glue fabric at top of drawer front to back of mat board
I attached a label holder/finger pull as described in an earlier post.

Because of the thickness of the banker’s box cardboard plus the mat board, my mini paper fasteners were barely long enough to go through. I needed to use a scissors to bend back the prongs.
And voilá, my homemade file drawer is finished!

My diy file drawer in all its glory
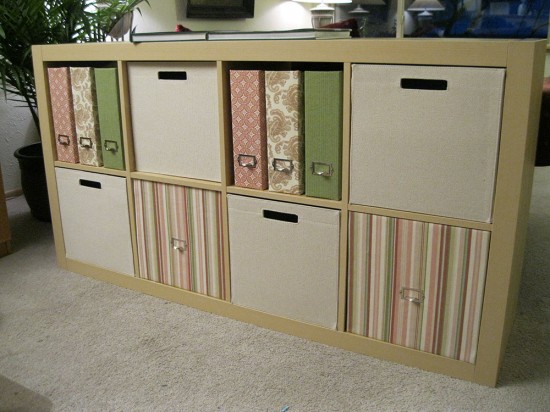
And here it is with the other containers!

Related post: DIY Magazine Files


